

Here are some of the beautiful old lace borders I “inherited” from my godmother (see previous post), all made with one shuttle.
Tässä on osa yhdellä sukkulalla tehdyistä vanhoista käpypitseistä, jotka sain kummitädiltäni lahjaksi (katso edellinen postaus). Rakenteeltaan ne ovat hyvin yksinkertaisia, mutta aivan hurmaavia! Alimmainen on ohuinta pitsiä, josta näkyy kuvassa kaksi kerrosta. Se on luultavasti purettu nenäliinan reunasta sillä se muodostaa 116 cm pitkän kehän ja osa isoista renkaista on rikkoutunut.
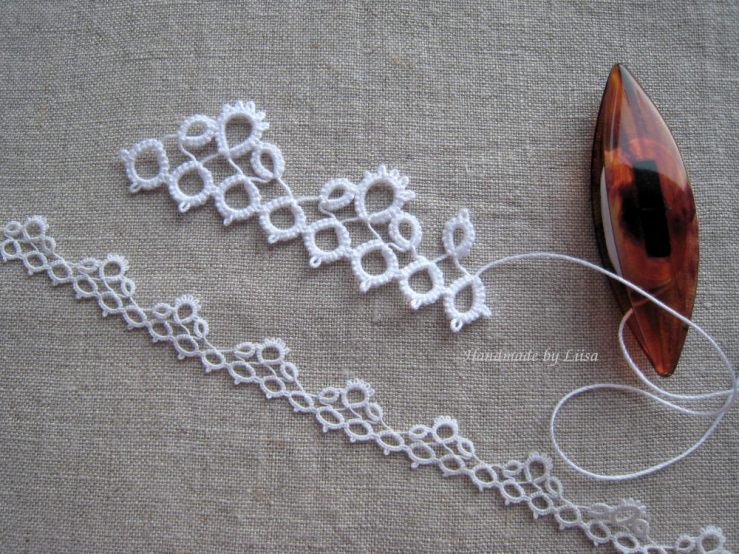
 This is my favourite. The original piece is tiny – maybe no. 100 thread. It’s a circle about 116 cm long and some of the big rings are torn so I presume it has originally decorated the edge of a handkerchief. I’m using no. 50 thread (which makes the height just under 1,5 cm) and one of the lovely old bone shuttles that I was also given 🙂
The small rings are all 3-3-3-3 rings and the big one is 3-3-2-2-2-2-2-2-3-3, the first and the last picot attached to the next ring and 7 picots in between. To keep it compact you have to make the transition from ring to ring quite short as I discovered after working on it for a couple of rounds.
*
Tässä samaa pitsiä hieman paksummalla nro 50 langalla tehtynä, jolloin korkeudeksi tulee noin 1,5 cm. Työkaluna on myös vanhoja peruja oleva luusta valmistettu sukkula 🙂 Pienet renkaat ovat kaikki 3-3-3-3, isommassa renkaassa 3-3-2-2-2-2-2-2-3-3.
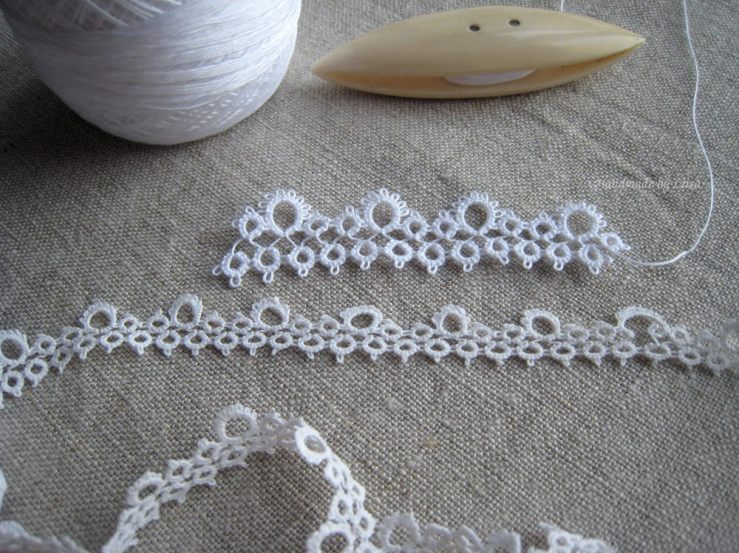
And how simple and charming is this! The original is maybe no. 70 thread and measures 1.4 cm high. I’m trying it out with no. 10 cotton. Patterns that have chains in the middle make a sturdier lace (eg. the one below or this one from a previous post), so I would use this one shuttle design to sew on top of a another fabric instead of on the edge.
*
R 5-5-5-5, R 7-7, R 5+5-5-5, R 5+3-2-2-2-2-3-5, R 5+5-5-5, R 7+7. Repeat.
*
Tässä yllä toinen kaunis ja yksinkertainen yhden sukkulan malli. Alkuperäisessä on käytetty ehkä nro 70 lankaa, korkeus 1,4 cm. Minun kokeilemallani paksummalla 10 langalla korkeudeksi tulee reilu 2,5. Kankaan reunaan, vaikka pyyhkeeseen, laittaisin sellaista tukevampaa pitsiä missä väleihin tulee ketjuja (kuten tässä alla tai tätä aikaisemmin kokeilemaani mallia), mutta yllä kuvatut sopivat hyvin kankaan päälle ommeltavaksi.

This is a design modified from ones I’ve come across on Pinterest. The bottom two rows are no. 20 thread, about 1,7 cm high, and the top one a crochet cotton (1,5 hook) which makes the hight about 2 cm.
*
R 3 x 8, CH 5 x 7, TW, CH 5-5. Repeat.
*
Tässä vielä yksi malli jonka versioita olen nähnyt useampiakin Pinterestissä (niissä tosin on lyhyemmän ketjun keskellä vielä pieni rengas). Sen voisi kiinnittää kankaan reunaan kummin päin haluaa. Alemmat kaksi riviä ovat 20 numeroista lankaa, korkeus 1,7 cm, ja isompi Novitan virkkauslangalla tehty, korkeus n. 2 cm.

[…] postauksessa näistä pisteistä […]
LikeLike
These designs are beautiful! Thank you for sharing. I would like to try these designs too:)
LikeLike
Do try! The one shuttle designs are nice and quick to work on 🙂
LikeLiked by 1 person
I will, Thank you! 🙂 By the way, if there happens to be not enough string in the shuttle do we just tie a knot to another end of the string? I find it a little difficult to tat with a knot on the string. I was wondering if you have any tips on this?
LikeLike
I would make a knot just where you start another ring and tat over both ends (just before tightening the stitch tuck the ends through the loop alongside the thread that goes to the thuttle). Or you could hide one end like this and the other one with the magic thread trick. Tattedtreasures.com have good tips 🙂 http://www.tattedtreasures.com/2012/01/tatting-tip-hiding-thread-ends-in-a-ring-only-pattern/
LikeLiked by 1 person
Thank you so much! 🙂 Looking forward to seeing more of you
LikeLike
Hello Liisa, I have tried one of your patterns, from the 4th picture. I am having a little trouble doing it. Would you kindly advice me on how to do it please? I have posted a picture of the halfway done lace, haha!
LikeLike
Hi Sunnyquilt! Hmm.. I think you’ll have to begin again with the ring. I’ll make a post of the design for you to explain the steps. So stay tuned 🙂
LikeLiked by 1 person
Thank you! I will be looking forward to your posts! 🙂
LikeLike
These are charming! Thanks for sharing. 😉
LikeLike
🙂
LikeLiked by 1 person
[…] through the steps for this tatted lace edging from my previous post […]
LikeLike