
I was so pleased with my first experiment with acid dyes 🙂 Sounds complicated and even dangerous to those not familiar with it, but you just need a dye, white vinegar to make the dye bath acidic and a pot to heat water in. And the dyes themselves are quite safe to use (provided you follow the instructions). Some of them are the same ones that are used for food colouring – not so dangerous.
I enrolled for the extended access of the Great Bra Sewing Bee, a virtual lingerie sewing conference that took place last weekend. The first recording I watched was Sue’s (from Bra Builders) class on acid dyeing. I’ve used iDye Poly before, which works pretty well on most of the materials I use for my bras, but was much more comfortable with the acid dye method. No fumes, except for the vinegar, and very little left over colour. (See my edit below for more info on the dyeing process.)
*
Ensimmäinen kokeiluni happoväreillä värjäämisestä oli lupaava 🙂 Happovärjääminen kuulostaa asiaan perehtymättömälle vaaralliselta ja hankalalta, mutta on kotikonsteinkin helppoa. Happo on tavallista etikkaa, värit turvallisia ja lisäksi tarvitaan sopiva astia veden kuumentamiseen.
Happovärejä käytetään useimmiten villalankojen värjäämiseen, sillä ne värjäävät proteiinipitoisia kuituja kuten villa ja silkki. Myös nylon eli polyamidi värjäytyy happovärimenetelmällä joten se soveltuu nylonia sisältävien alusvaatemateriaalien värjäämiseen. Jos aihe kiinnostaa niin ihania värjäysjuttuja ja paljon oikeaa asiaa aiheesta löytyy Tiitun labra -blogista.
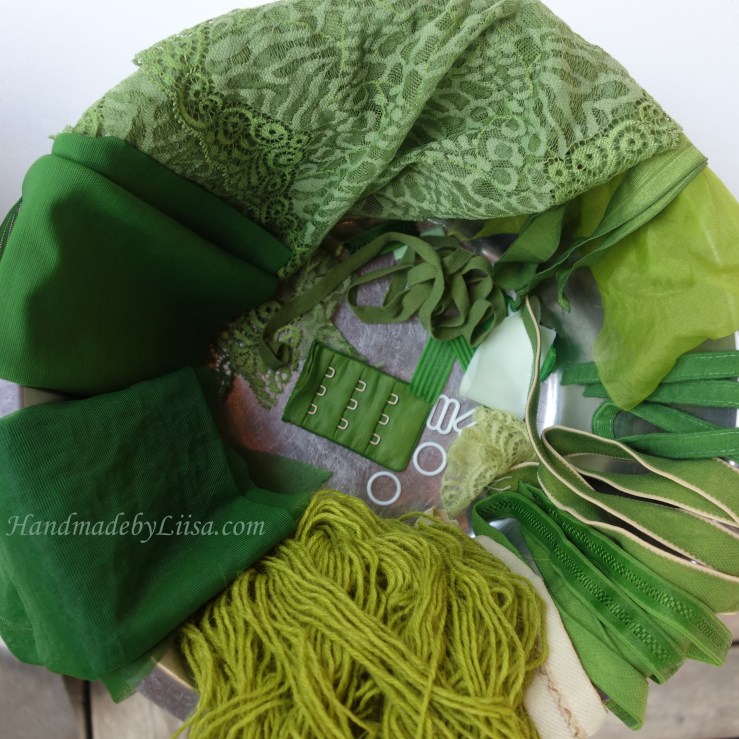
Tähän ensimmäiseen väriliuokseen tuli värjäyksen eri vaiheissa moneen otteeseen sekoiteltua lisää värejä, mutta tavoitellessani oliivinvihreään taittavaa sävyä oli perustana vihreä johon lisäsin keltaista ja harmaata. Ruskea olisi ehkä toiminut vielä paremmin, mutta sitä minulla ei (vielä) ole. Eri materiaalit imaisevat värin vähän eri lailla, ja harmikseni paksummat materiaalit (duoplex ja simplex) eivät juurikaan värjäytyneet. Sen sijaan tästä lähtien taidan värjätä itse villalankani; viimeiseksi väriastiaan pudottamastani vaaleanruskeasta Nalle vyyhdin puolikkaasta tuli herkullinen vaaleanvihreä kun se imaisi vedestä lopun väriaineen 🙂 Värit hankin Vyyhti.fi:stä (joka on valitettavasti lopettanut toimintansa, vastaavia Ullaka.fi).
Tässä alla polyesterin värjäämiseen tarkoitetulla iDye Polyllä pari viikkoa sitten värjäämäni erä rintaliivimateriaaleja. Tällä kertaa tavoitteena oli vaalea turkoosi. Ensimmäisenä laitoin värikattilaan tätä tarkoitusta varten ompelemani valmiin valkoisen rintaliivin joka värjäytyi todella tummaksi. Kaadoin väriä pois ja kokeilin seuraavaan erää – keskellä oleva pitsi ja kuminauhat. Ohentamalla vielä huomattavasti liuosta sain haluamani vedenvihreän sävyn. Kuminauhat ja venyvä takaosa värjäytyivät nopeasti, mutta simplex kangasta pyörittelin padassa ainakin puoli tuntia. Siitä ompelin yksinkertaisen liivin kokeillakseni uutta tuunattua mallia Harriet liivistäni.
Värjäyskokeiluni jatkuvat – tilasin juuri ison kasan valkoisia värjäykseen sopivia materiaaleja Bra Buildersiltä. Jos rintaliivien ompelu kiinnostaa mutta värjäys tuntuu hankalalta heillä on todella herkullinen kattaus eri värisiä kuminauhoja ja muita materiaaleja sekä paljon hyödyllistä tietoa aloittelevalle ja vähän kokeneemmallekin alusvaateompelijalle 😉 Lähetyskulut USA:sta ovat tietysti huomattavat, ja lähempänä olevaa ruotsalaista Bwear nettikauppaa voin myös lämpimästi suositella!
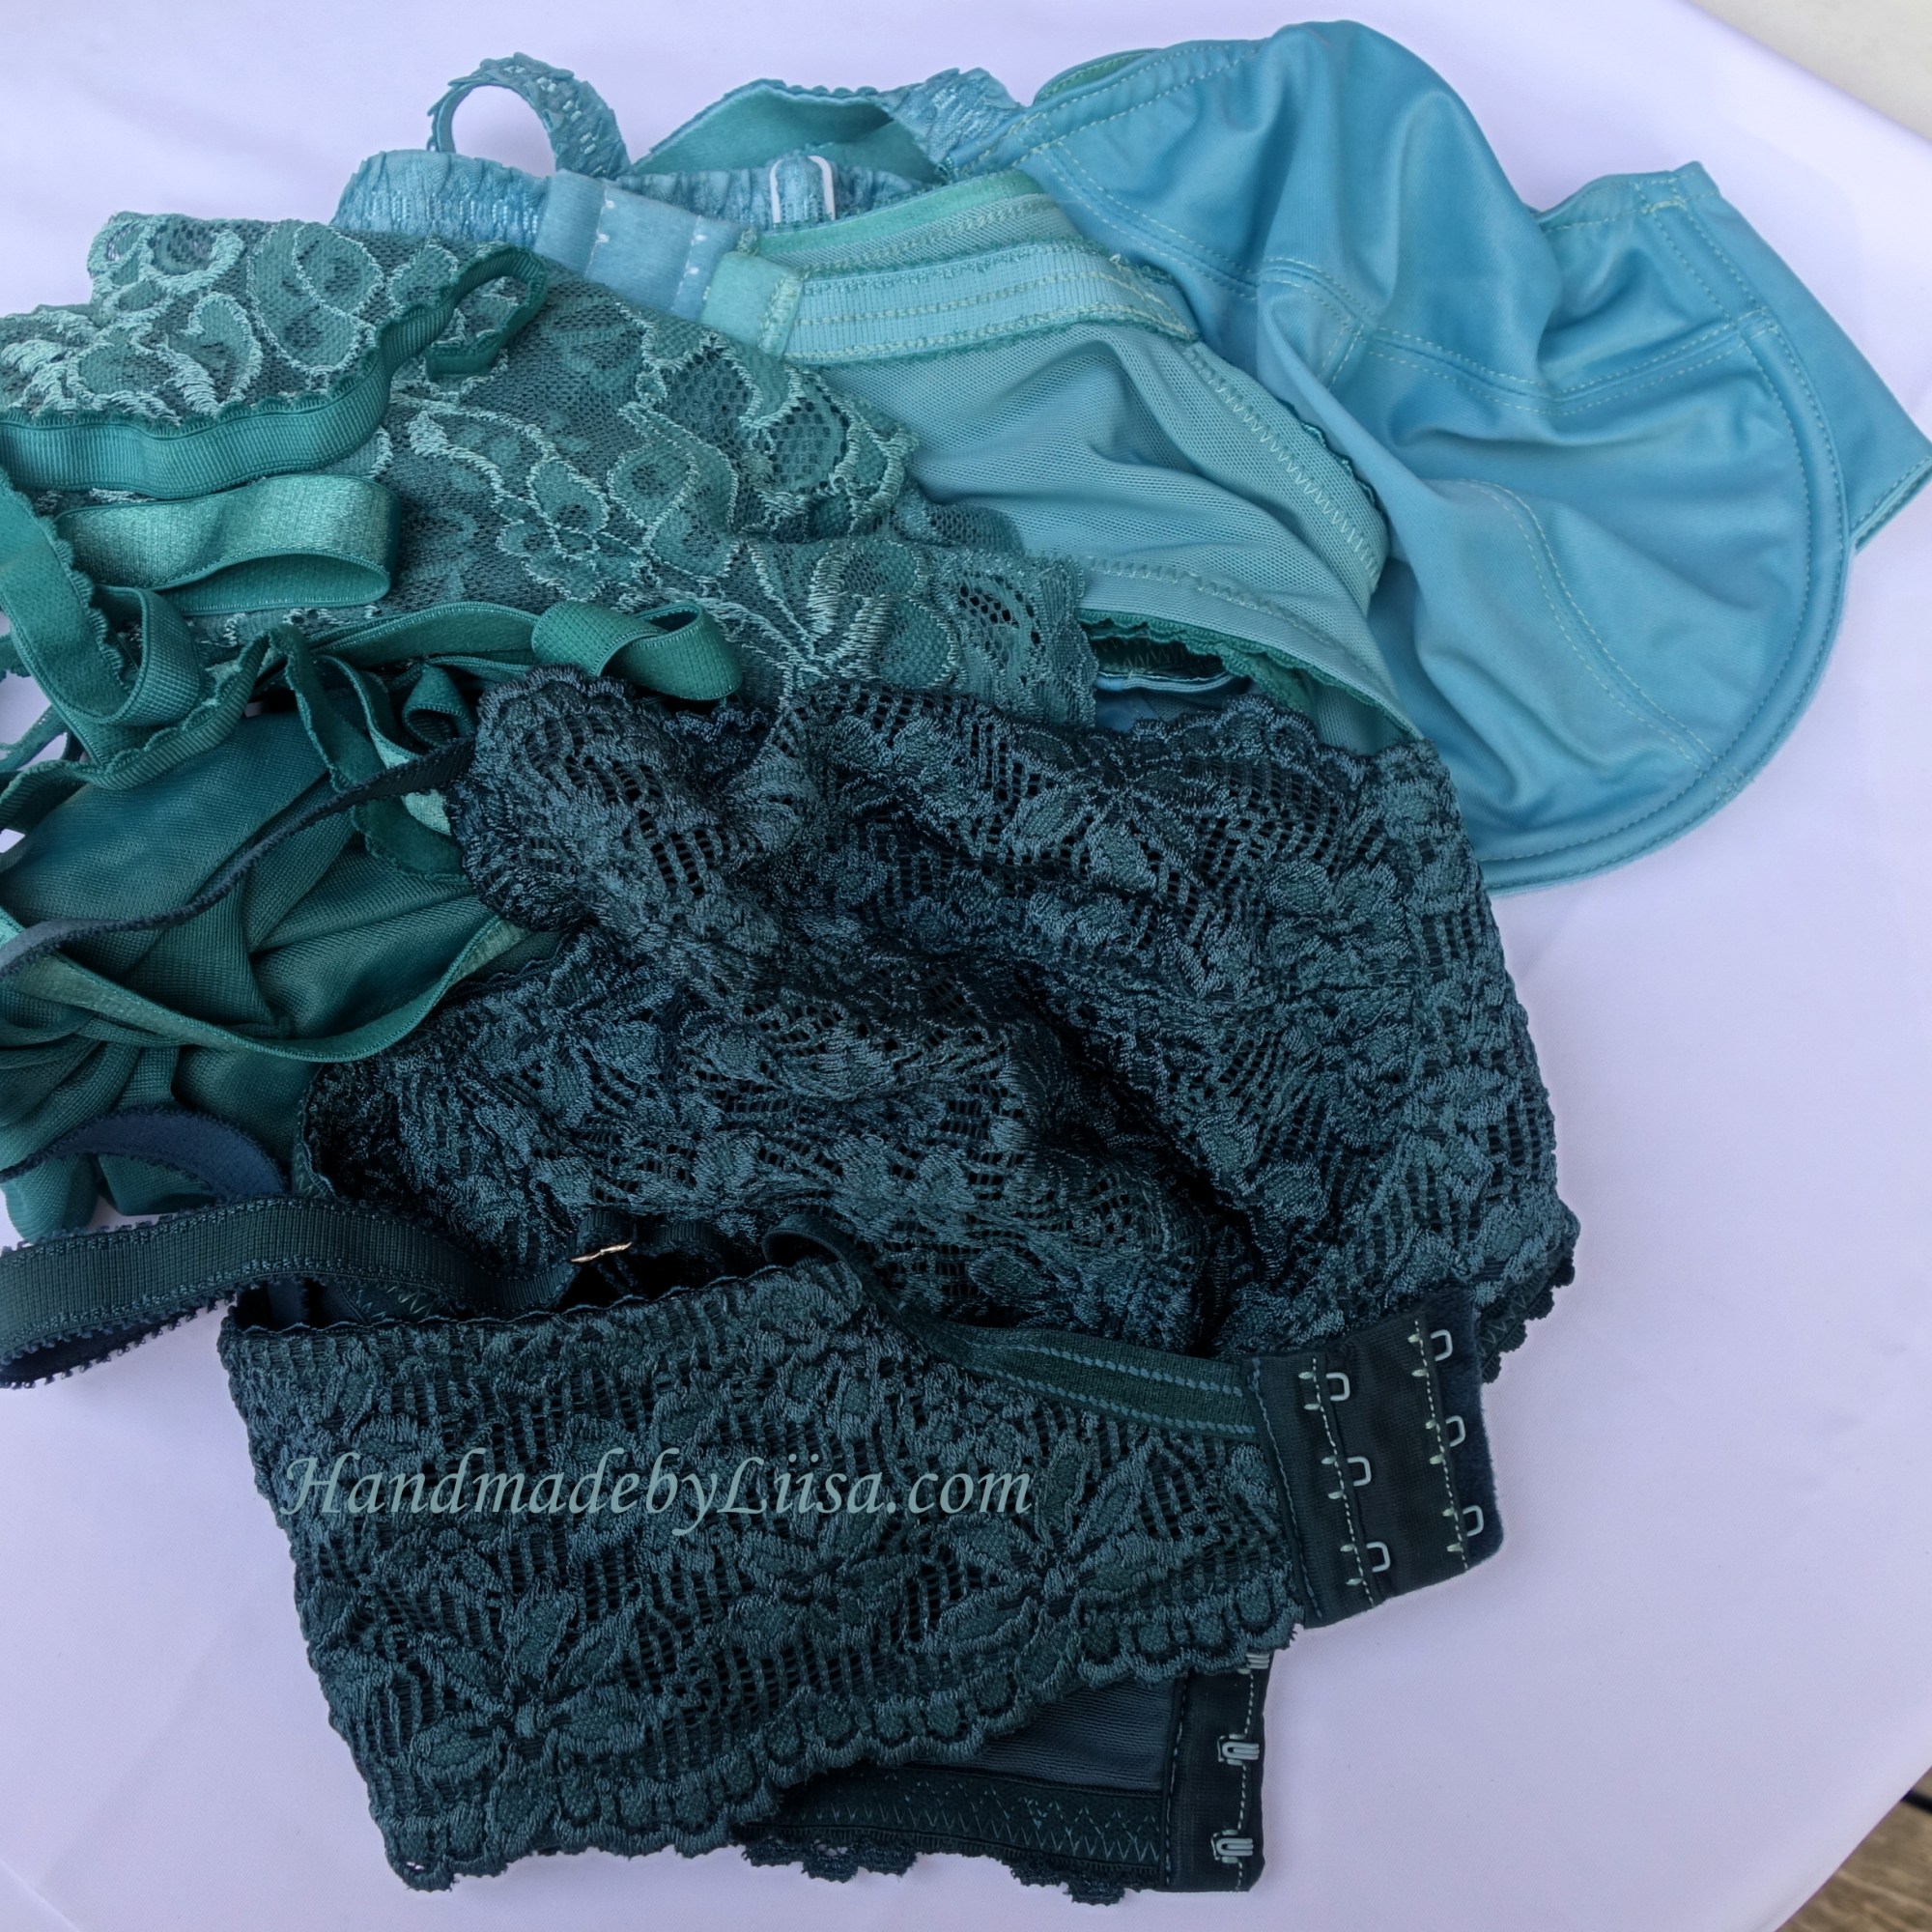
Here’s a dye lot I did a couple of weeks ago with iDye Poly colours. I was going for the light teal colour, which I managed last after the dye bath had been exhausted with the darker ones and I had diluted it considerably along the way! The darkest lot is a bra that I sewed before dyeing and in the middle you can see some lace and other materials that came out a more greeny colour. The bra on top is one that I made from the dyed simplex material and my coordinating findings to try out my Harriet pattern as a partial band (makes sense to bra builders 😉 ) Dyeing the simplex took a long time and as you can see the stretchier materials such as the power bar and some of the elastics took on a more yellow hue as they caught the dye much faster.
So – I’ll continue my experiments with the acid dye. Just placed a big order for white dyeables to Bra Builders, who by the way have a gorgeous colour palette of ready dyed kits and materials if you’re not game to try dyeing yourself! Closer by in Sweden Bwear is a big favourite of mine for lingerie materials 🙂
Edit on 16.8.2021:
With all the nice feedback I’ve been getting on Instagram I’ll elaborate a little on this last dye batch of greens in English too 🙂
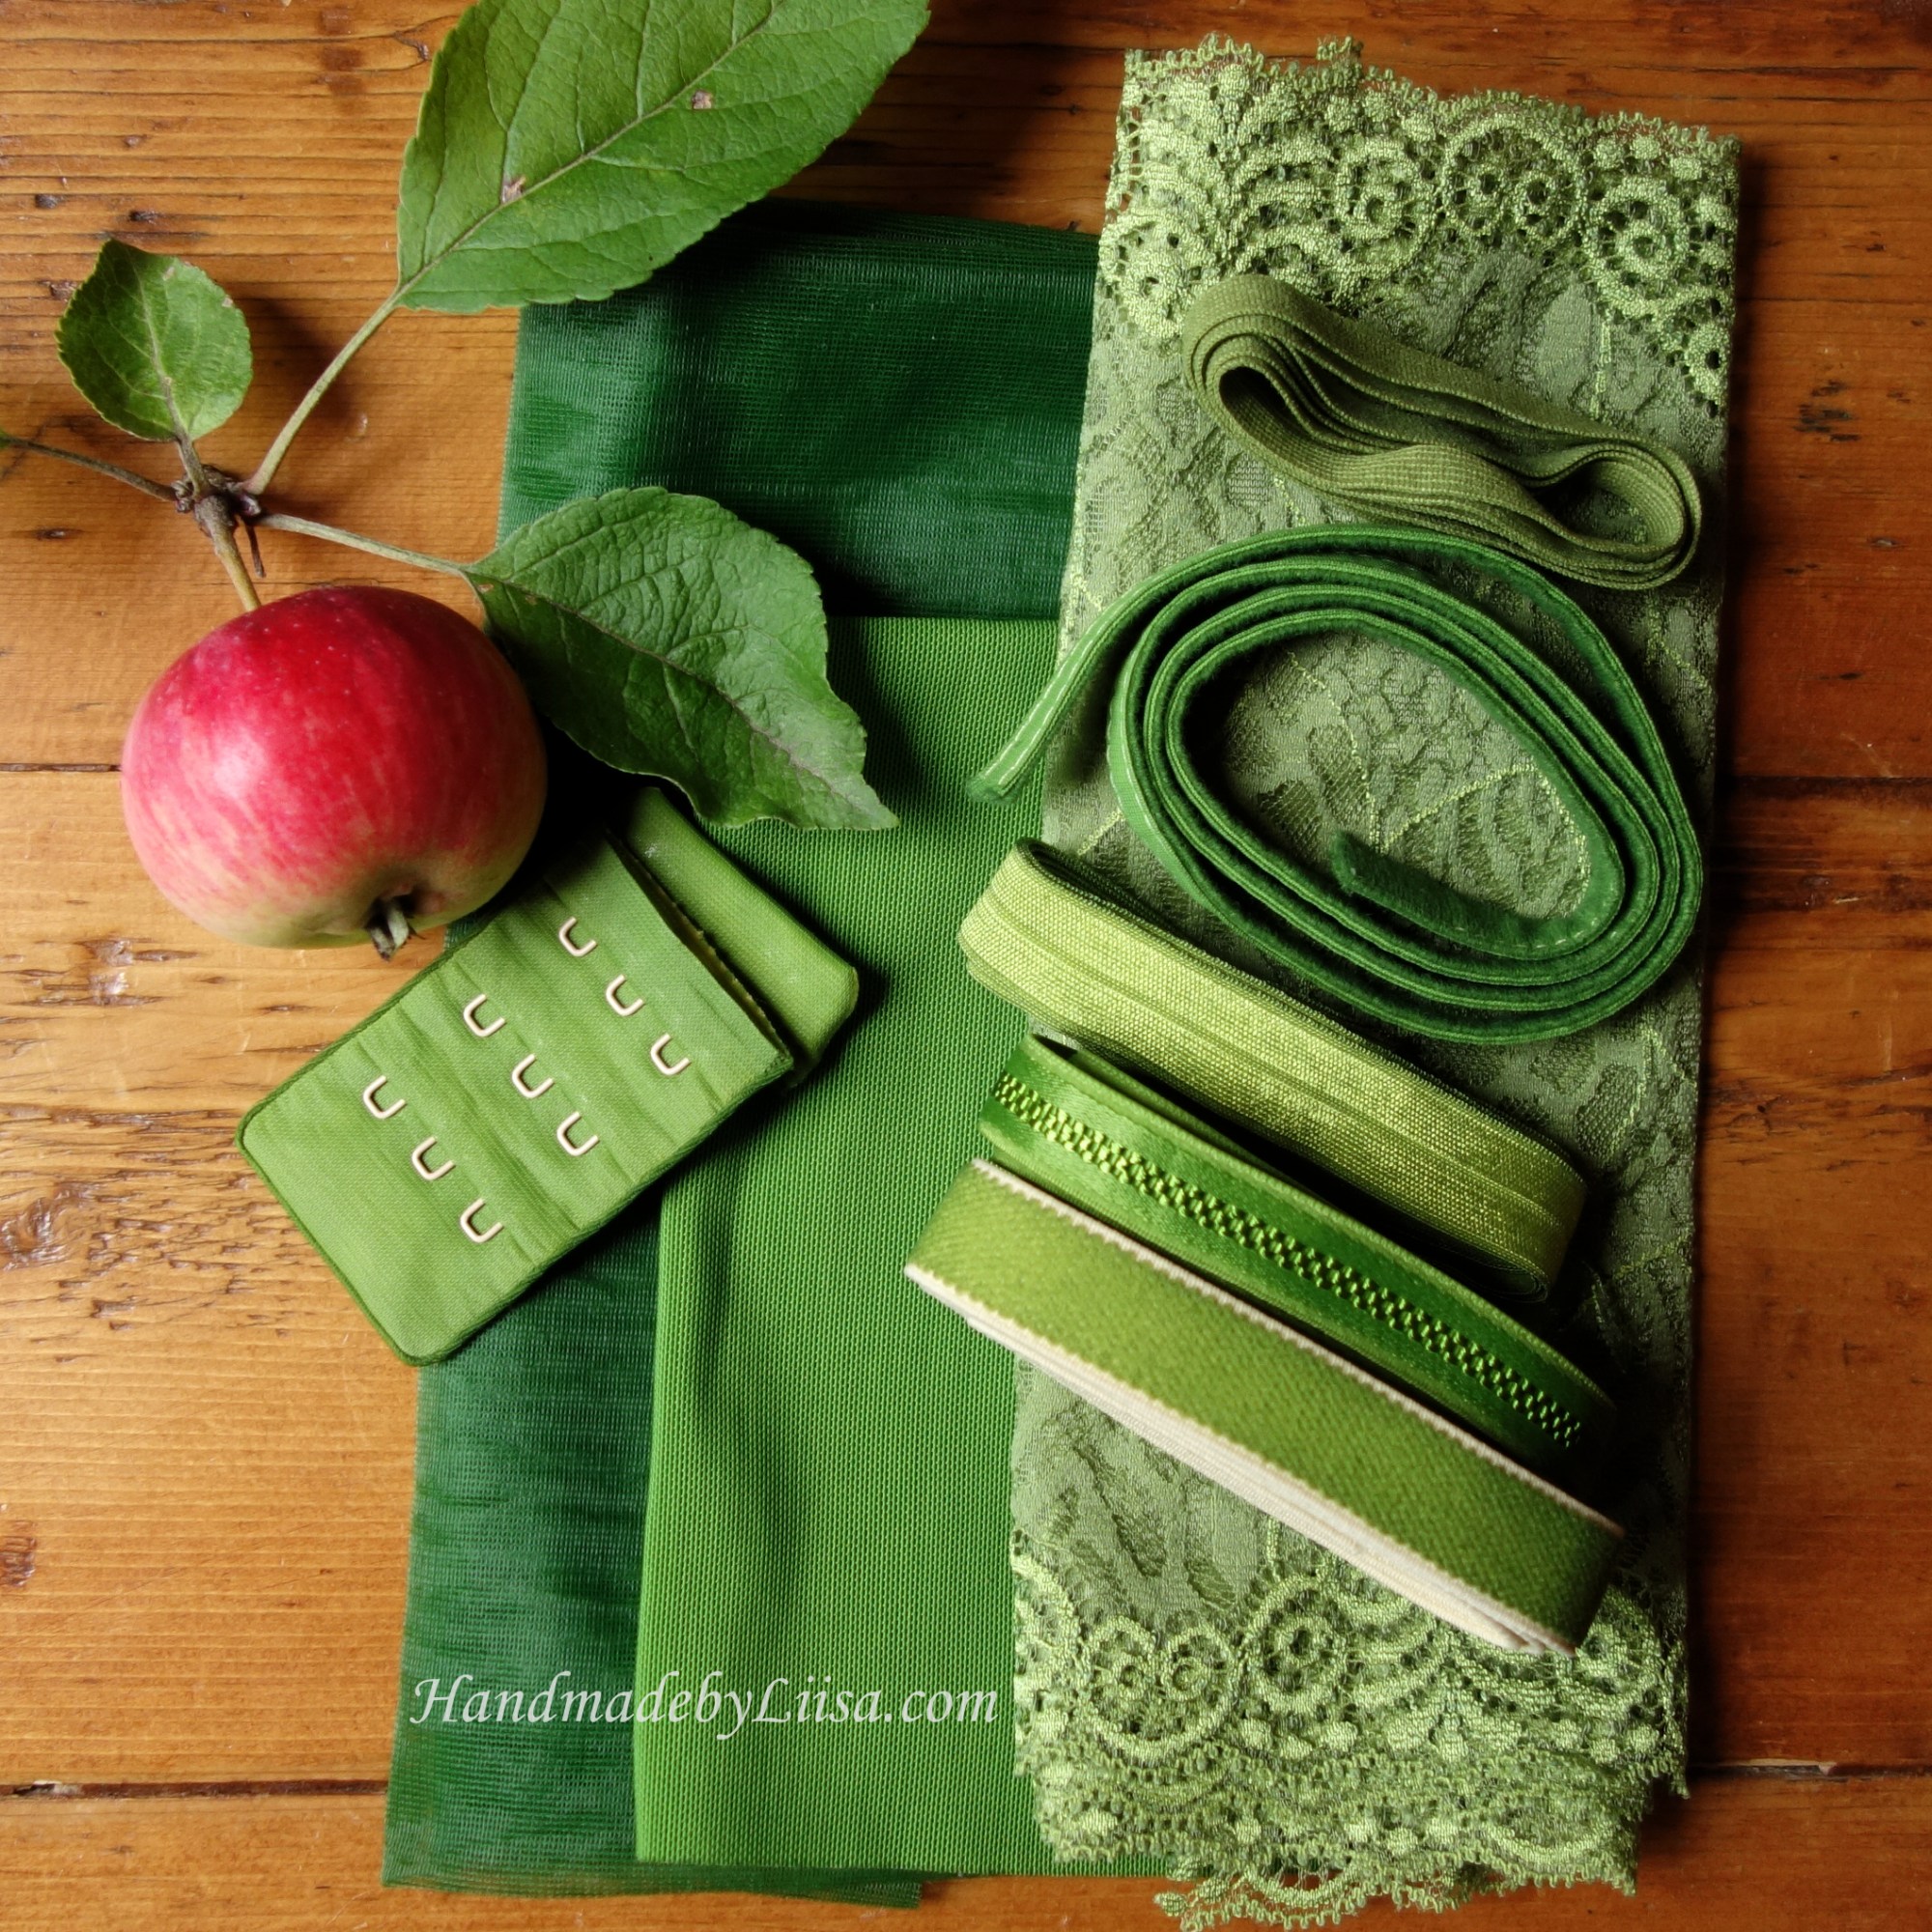
Some of the materials were coloured to start off with: the power net, fold over elastic and wire casing were white, the lace was a pale blush colour and the rest were beige or light skin colour (as the narrow picot elastic next to the wool which did’t take any colour, so apparently has no nylon). The beige components were the sheer cup lining (turned out the darkest), the plush band elastic (the edges of which stayed beige), the strap elastic, the hook and eye closure, and some stabilizing tape. In the photo above you can also see a tiny piece of the lace just dipped in to the green to see if it will take any colour at all, a tiny piece of simplex which took just a hint of hue despite being in the bath for ages, and the plastic rings and sliders which were at the bottom of the dye bath through the whole process and remained white – so no nylon in them either.
I started with green Eurolana dye from Worldofwool.co.uk and purchased through the Finnish online shop Vyyhti.fi. (The same kind of acid dyes you can get from Jacquard or Dharma for example.) Aiming for a more olive green I added bright yellow to the dye bath and finally also a hint of grey. The cup lining took the green very fast and wasn’t much moved by my fine tuning after that. Also the power net took in the colour pretty fast but still moved a bit towards a yellower green with my adjustments. The other components I played around with more, taking them in and out and adding more yellow and grey. The beige hook and eye closure was in the bath probably the longest, but the result is very nice. If your aiming for a muted colour my advice (disclaimer: VERY limited and based on this first try!!) would be to start with a small amount of dye and add from there. All in all I’m very pleased with the results 🙂

Alusvaatteiden värjäys kuulostaa hyvältä. Isorintaisena olen kyllästynyt kauppojen suppeaan värivalikoimaan: musta, valkoinen ja beige. Kiitos Liisa erinomaisesta vinkistä!
LikeLiked by 1 person
👍Valkoiset tietysti värjäytyy parhaiten mutta beigeistäkin tulee vaaleilla väreillä mukavan murrettuja värejä 🤗 Eikun kokeilemaan! 😘
LikeLike