
My dyeing experiments continue with shibori, which is the name given to a variety of traditional Japanese resist dyeing techniques. This is the same kind of sewing method that I’ve seen used in Guinea, Africa with indigo dyes (which I’m planning to come back to in a later post..). It took me a while to grasp how simple it really is. Once I understood that all the stitches are pulled tight only after stitching the whole fabric it started making sense to me. I’m pretty happy with this first try 🙂
*
Ensimmäinen värjäyskokeiluni ompelemalla toteutettavalla shibori tekniikalla onnistui ilahduttavan hyvin! Shibori on ikivanha japanilainen estovärjäystekniikka jota voi tehdä monella eri tavalla. Tätä ompelein toteutettavaa metodia olen nähnyt käytettävän indigovärjäyksen yhteydessä Guineassa, mutta nyt vasta keksin miten se oikein toimii – ei niinkään monimutkaista kuin luulin 🙂
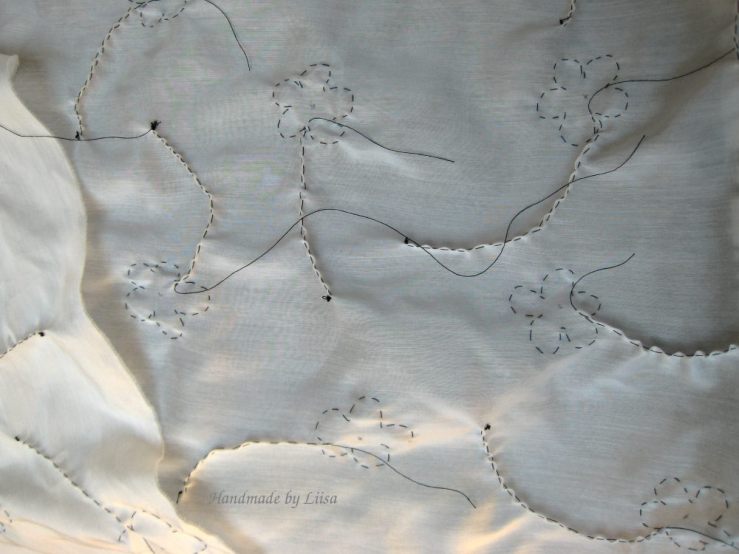
I cut a 35 cm wide strip from the silk/viscose fabric (135 cm wide) that I had bought for this purpose. I then marked the centers of my flowers with a pencil (I suggest you use a soluble marker – the pencil marks didn’t come off!). I first sewed a curvy stem for the flower by pinching the fabric and sewing simple running stitches on the edge. Then I sewed running stitches around the five “petals” and left an end to pull the stitches tight.
*
Leikkasin silkki-viskoosikankaasta 35 cm leveän palan (kankaan leveys 135 cm). Merkasin lyijykynällä sopivin välimatkoin kukkien keskustan kohdan (lyijykynä ei lähtenyt vielä värjäyksen aikana pois joten suosittelen vesiliukoista merkkauskynää!). Ompelin kukkavarret kankaan taitteeseen etupistoilla ja jatkoin kukkien terälehtiä mukaellen kukan ympäri. Langan pään jätin odottamaan kiristystä.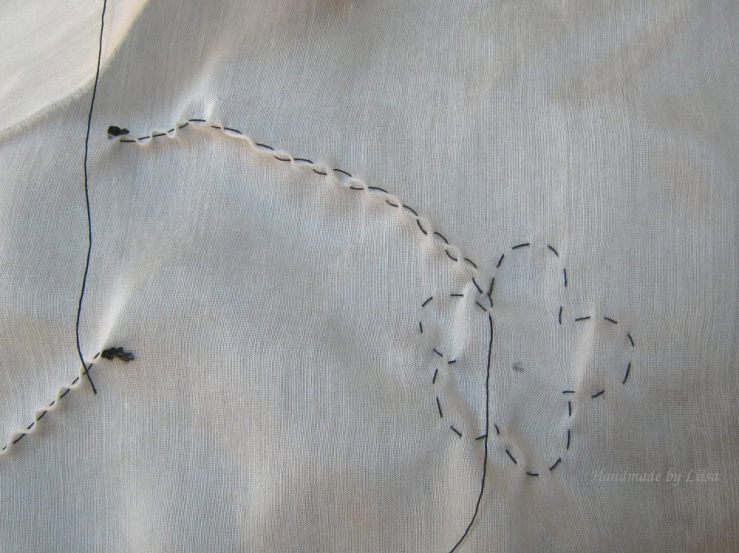
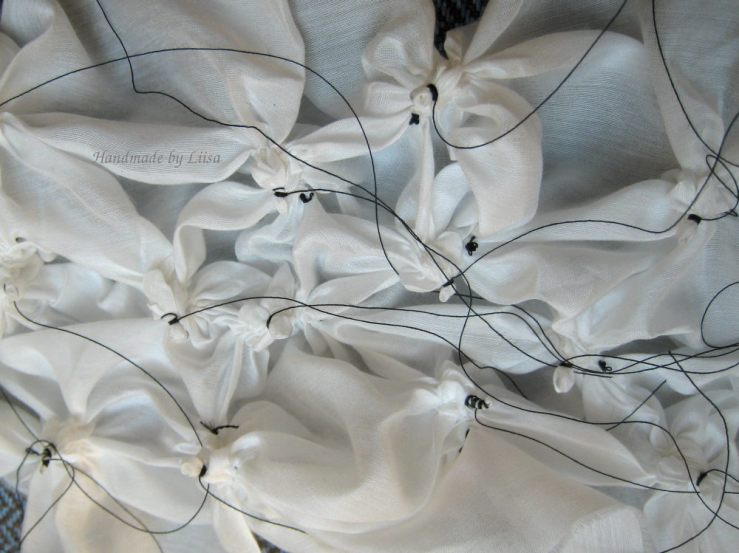
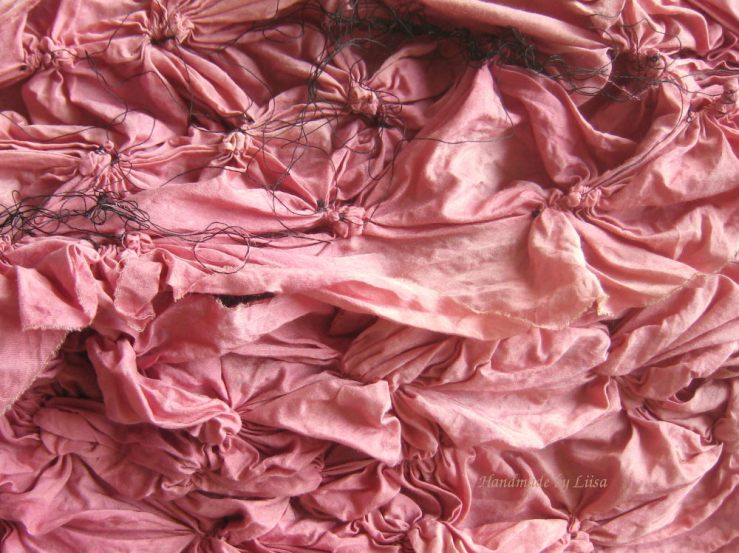
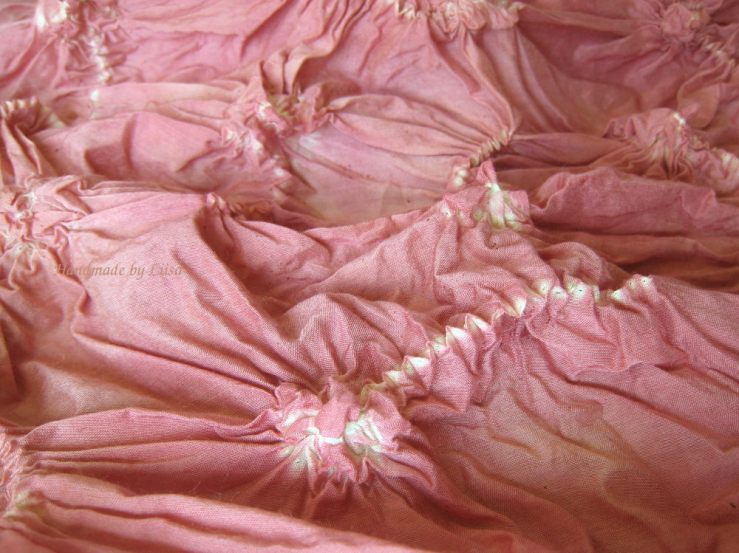
After sewing all the flowers I pulled on the ends to gather up the stitches. The tighter you manage to pull them the better “resist” you’ll get while dyeing. The sewing thread needs to be a sturdy one so it doesn’t break at this stage! I finished by winding the thread around the center of the flower and making a twisted knot around it a couple of times (clove hitch knot in English?…).
*
Kun koko kangas on saatu ommeltua on ompeleiden kiristyksen vuoro. Langan pitää olla vahvaa laatua ettei se katkea tässä vaiheessa! Kiristin varovasti mahdollisimman kireälle ja pyöritin lankaa vielä kukan keskustan ympärille. Viimeiseksi tein pari siansorkkasolmua.
I had planned to do the dyeing with avocado pits after my experiments with avocado skins , but having boiled the scarf in the dye for over an hour I wasn’t getting the rosy results I wanted. I happened to have some Bordeaux red dye (Deka Batik&Textile “L”) for some future project so I added a tiny bit of that to the pot. I wanted to to see the results of my shibori clearly!
*
Olin suunnitellut käyttäväni värjäykseen avokadon siemeniä joilla toivoin syvää ruusun sävyä, mutta keiteltyäni suurella vaivalla ompelemaani kangasta värjäysliemessä yli tunnin ajattelin että työni menee hukkaan jos väri on laimean rusehtava! Lisäsin hippusen Bordeaux:n punaista värijauhetta (Deka Batik&Textile “L”), jota olen hankkinut vohvelipyyhkeiden värjäykseen.
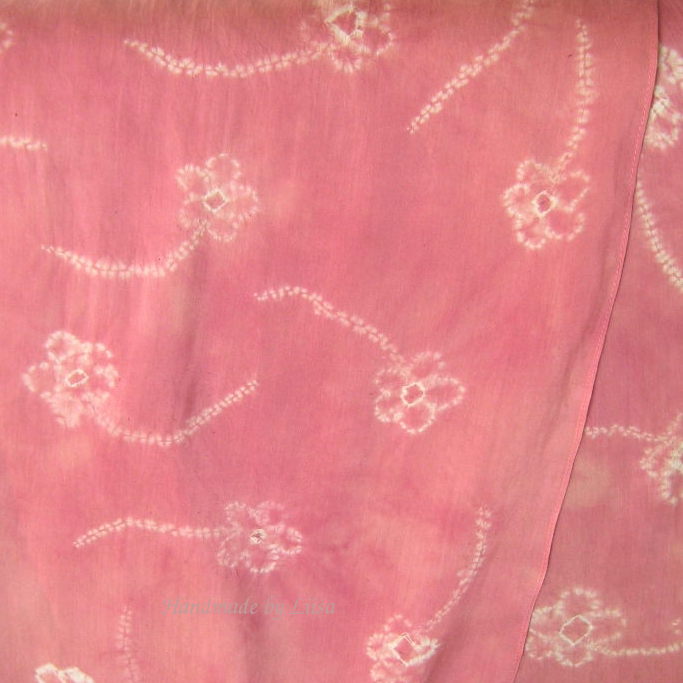
After dipping the fabric in the boiling dye for just a couple of minutes I was quite happy with the colour. The finished result is not uniform but I prefer it that way.
*
Sekoittelin huivia vain pari minuuttia kiehuvassa väriliemessä ennekuin olin tyytyväinen. Vähän epätasaiseksi jäänyt väri on myös kauniin eloisa.
 The fun part of this project was undoing the stitches and unravelling the flowers! Here you have to be careful not to damage the fabric. I used a cutter to break the thread and then eased the knot off the tip of the flower with my nails.
*
Hauskin osa värjäystä oli ompeleiden irroittaminen. Tässä vaiheessa pitää olla varovainen ettei riko kangasta. Katkaisin ensin langat varren kohdalta ratkojalla ja ujutin sitten kiristetyn langanpään kynsillä kukan keskustan päältä.


I tried all kinds of different ways to tie the center of the flower. The bottom one on the right for example was only tied around the stitches on the edge of the flower leaving the center untied and full of colour. The one above it was tied nearly all the way up to the center letting only a little colour through.
*
Tässä yllä näkyy kokeiluni eri solmimistavoilla. Alin kukka oikealla on esimerkiksi solmittu vaan kukan terälehtien ompeleiden kohdalta niin että keskusta jäi vapaaksi. Sen yläpuolella oleva kukka taas on ollut käärittynä melkein kokonaan lankaan.
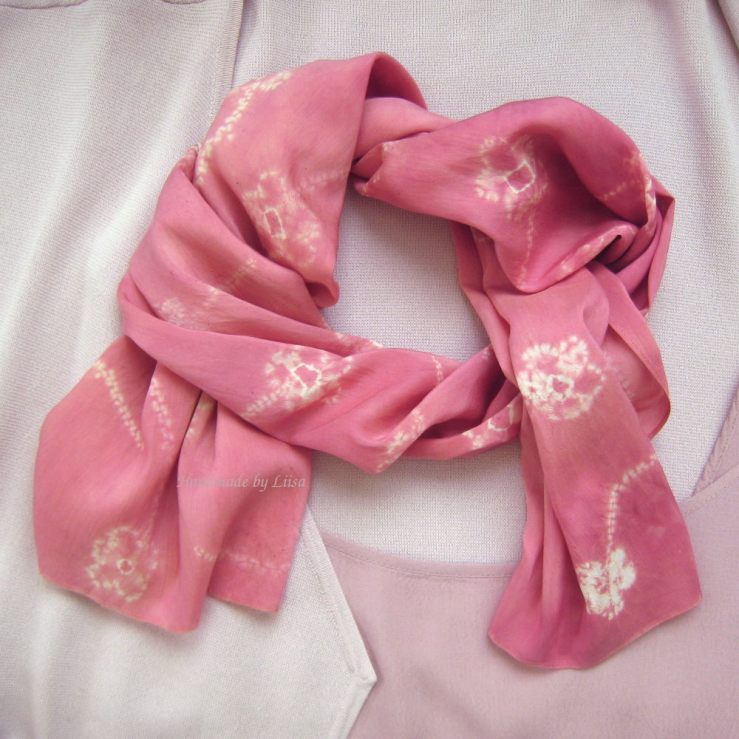
Did you know that “rose quartz” is one of the top fashion colours this spring? This is my new cardigan and top with which I now have a new favourite scarf 😀
If you want to learn more about shibori you can find a lot of information on the World Shibori Network site . This community was established in 1992 to support, sustain and promote this fabulous traditional craft.
*
Tämän kevään huippumuotia on vanha roosa ja tämä huivihan sopii tähän värimaailmaan mainiosti!
Lisää shibori-värjäyksen traditiosta, tekniikoista ym. löytyy tästä linkistä.
